Here is just another method used in
flashing/upgrading devices running on Amlogic chips. This method involves the
use SDcard ie we are burning the image to the SDcard. If you are looking for
how to flash/upgrade these types of devices with PC directly using AMlogic USB
Burning Tool, follow the tutorial here
How to use Amlogic Burn Card Maker
Put the SDcard into a USB card reader and
connect to PC. (Note SDcard is going to be formatted during this process)
Download BurnCardMaker v2.0.2 (3.96 MB) from here.
Extract the archive and run Burn_Card_Maker.exe as administrator.
Extract the archive and run Burn_Card_Maker.exe as administrator.
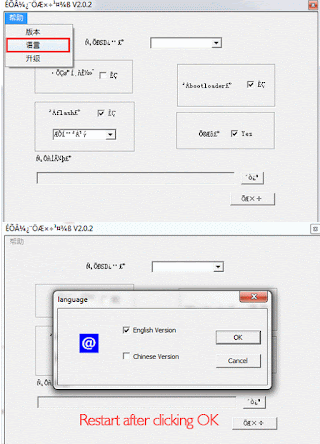
You can now click on the Chinese menu at the top then select the second option and tick English Version.
Close the app and run again as
administrator.
Now under Choose disk menu, Select the SDcard you want to burn the image to.
Tick the following options:
erase_flash (select erase in normal)
erase_bootloader
Reboot
Under Choose your image files, Click Open
button then navigate and select the firmware image file (file name ends in .img)
of the Amlogic device you want to flash/ upgrade.
Click Make button.
You will see a pop up telling you SDcard
will be formatted. Click OK.
After formatting the SDcard, click done.
Burning image to SDcard will start. This
process usually takes about 10 minutes too complete.
When the process is done, insert the micro
SD card in the Amlogic device then power it on. Device will enter recovery mode and flash/upgrade
process will begin.
When it’s done, the device will reboot. You
can now remove the SDcard from the device then wait for remaining update
process to complete.
Hope this helps
Like and Share


nice theread
ReplyDeletecomment from Ballowap.com.ng
nice one
ReplyDeletecomment from Azeez Blog
This was useful bro
ReplyDeleteFrom: Jboytech Blog